If you have read some of my other posts you’d know that I’ve got a couple of Network Attached Storage devices from QNAP and Synology. I’ve settled on using the Synology as my primary array with the QNAP as a backup. I recently moved into a new apartment with 100mbit fibre Internet and this has allowed me to use some of the server features of the Synology and shut down a couple of my dedicated servers I have hosted overseas.
I needed to FTP remotely into my device and I’ve set up FTP servers behind firewalls since the late 90s and thought this would be a piece of cake. Turns out it is, if you know the right buttons to push! The following is a guide on how to get Synology FTP with an Airport Extreme firewall working.
Tech Information
- Synology DS1512+ Network Attached Storage running DSM 5.0
- Apple Airport Extreme 5th Generation
- 100mbit connection with static IP with DNS setup to homeoffice.mydomain.com
There are two parts to this setup, the first is configuring the built-in FTP server on the Synology and the second is to configure the port forwarding on the Airport Extreme.
Setting up the FTP server on the Synology.
Step 1.
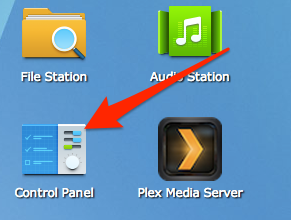
Login to your Synology as an Administrator and open the Control Panel.
Step 2.
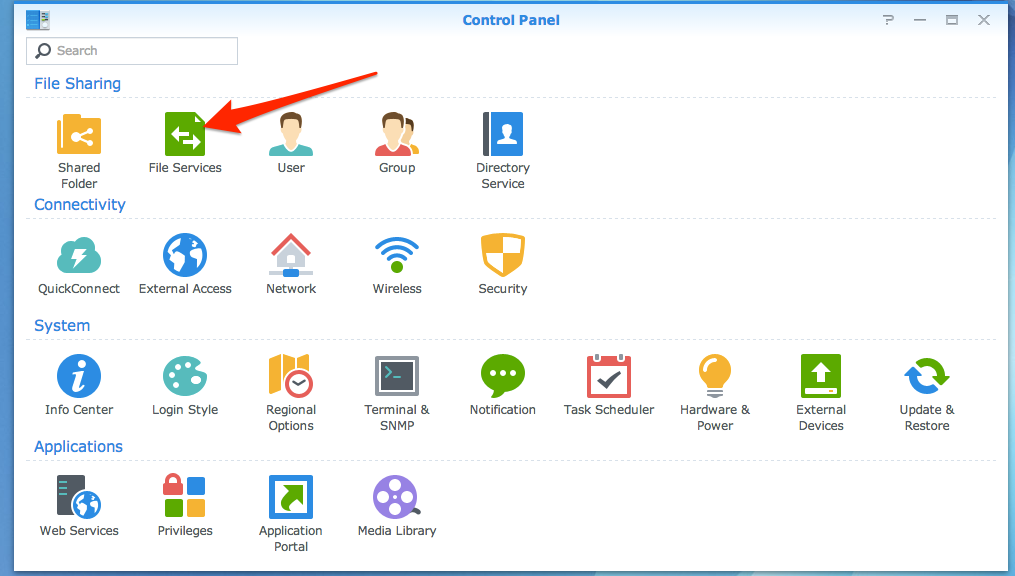
Open File services
Step 3.
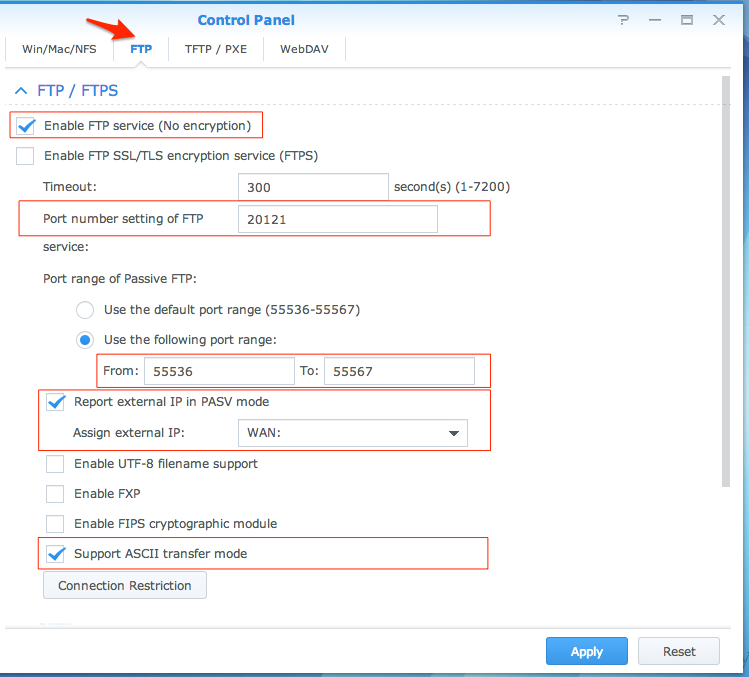
Select FTP from the top it is the second Menu Item. Then configure the following options:
- If it isn’t already, tick the Enable FTP Service option
- Change the Port Number Setting to something else. I chose 20121
- Select Use the following port range for Port Range of Passive FTP but don’t change the default values.
- Tick Report External IP in PASV Mode (it should auto detect your external IP and show it in the box)
- Tick Support ASCII transfer mode
Step 4.
Save your settings by clicking apply.
Step 5. Optional Settings.
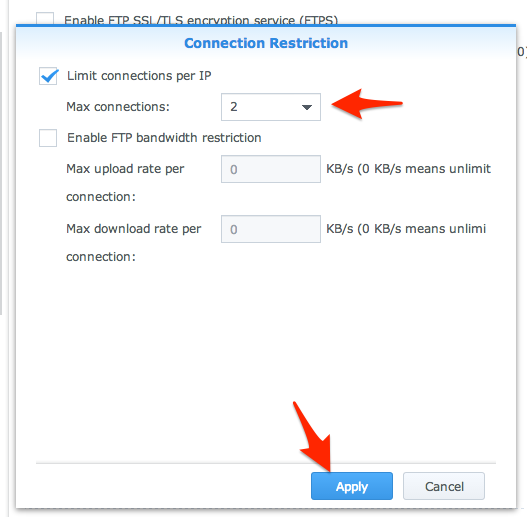
If you click on the Connection Restriction button, you can restrict how many connections someone has to the NAS. Handy if you let other people FTP into your NAS. You can also control incoming and out going bandwidth speeds if you like, handy if you have a slower than fibre connection.
This is all you need to do to configure the FTP server on the NAS. Next you have to forward the relevant ports on the router to the internal NAS.
Configure The Airport Extreme.
Step 1.
Login to your Airport Extreme using Airport Utility. Click on your airport and then click Edit. Enter your admin password details if prompted.
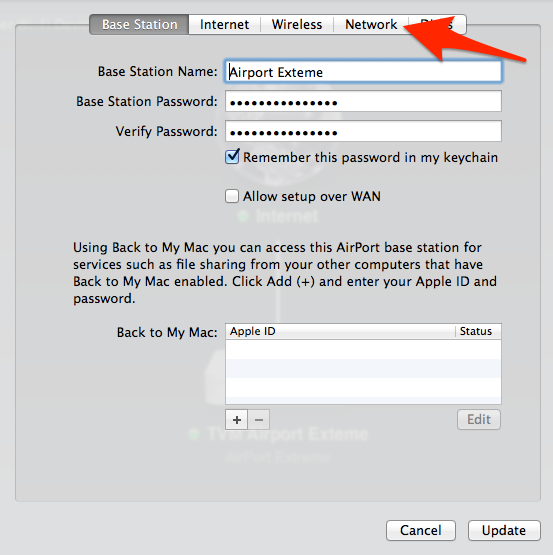
This will give you access to the settings on your extreme. The settings you will need are on the Network Tab.
Step 2.
Click the network tab to configure the port forwarding.
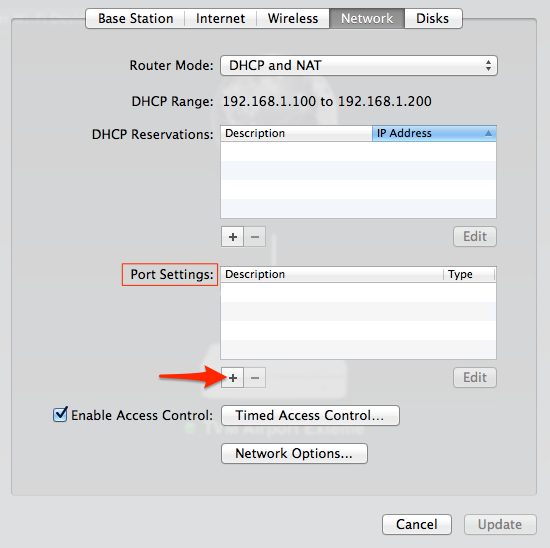
On this page is the Port Settings section which is where we will configure the port forwarding. Click the plus [+] button to add the first of 2 port rules.
Step 3.
Configure the FTP Access Port. After you click the plus you will be prompted to give the port details.
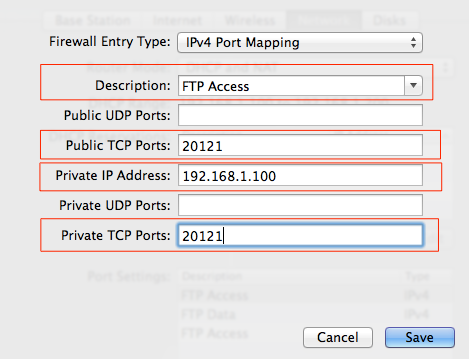
- From the drop down select FTP Access.
- Change the Public TCP Ports to the number you configured on the Synology. For me this is 20121
- Change Private IP Address to the IP of your Synology for me this is 192.168.1.100
- Change the Private TCP Ports to the same port number as above 20121
- Click Save
Step 4.
Configure the FTP Data ports. This is the high port range you selected on the synology.
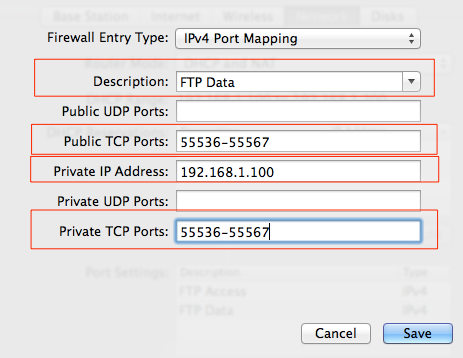
- For the description type FTP Data.
- Change the Public TCP Ports to the range you selected on the Synology. For me this is 55536-55567
- Change the Private IP Address to the IP of your NAS for me this is 192.168.1.100
- Change the Private TCP Ports to the same as the public above 55536-55567
- Click Save
Step 5.
Update your Airport extreme. The last step is to click update and let your airport restart.
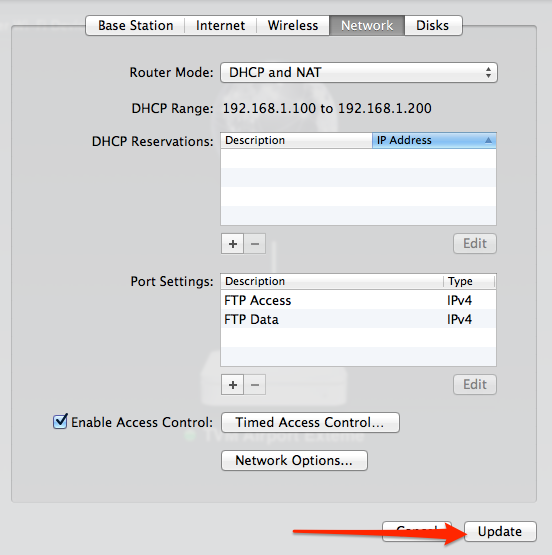
Your ftp server should now be available to any users that have FTP active under their account settings.
Update : 12 October 2014
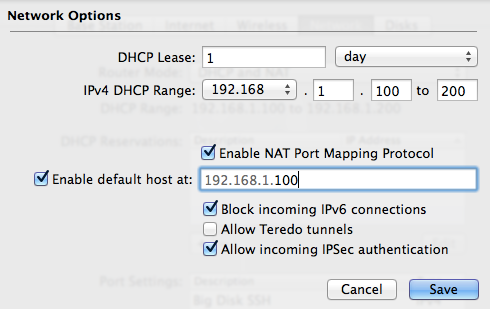
The above configuration worked for me however Peter has noted in the comments that he also needed to enable another option to get this to work for him. He had to enable the default host option on the Airport Extreme.
Enable Default Host
To enable Default Host you need to access follow the directions in Step 1. to access the airport’s options, then click on the network tab. Then click on Network Options.
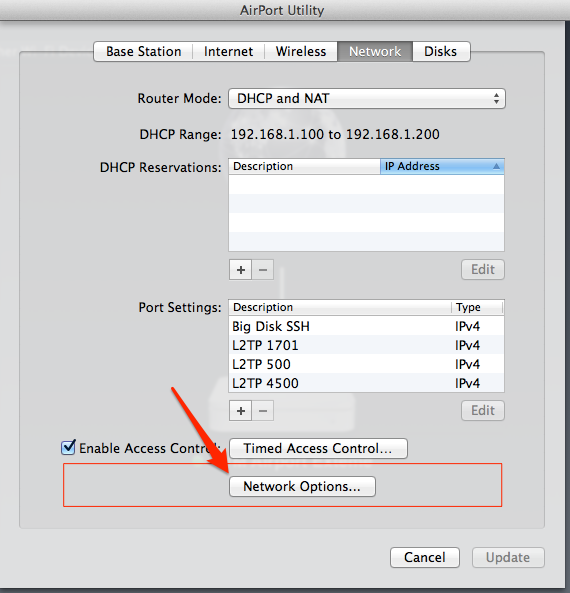
This will present you with a screen with a few options. Tick the box to enable and enter the IP of your NAS.
Thanks for the tip Peter.
Update: 29th September 2016
As Jim has noted below you should be cautious when enabling default host as this opens up the entire machine on that IP to the internet. This means you must ensure you have your firewall on and active for that computer/host.
Comments
6 responses to “Synology FTP with an Airport Extreme Firewall”
Thank you for the nice setup manual. However, for me it still was not enough to get ftp working. In addition to the setup explained here I also had to enable the default host option with the ip of my synology in the network options
Thanks for the feedback Peter. I’ve updated the post to include your tip.
Be aware that enabling the “Default Host” option exposes all ports of that host to the Internet (unless those ports conflict with port mappings for other devices on the AirPort Extreme), so you’d also want to review the firewall configuration on the Synology Diskstation to make sure you are only letting in what you want. In other words, enabling “Default Host” is the “sledgehammer” solution to make things work.
Hi Jim, You are correct, I’ll add this to the post also.
Thanks for this guide, but I tried to setup my ftp with port 21 and it doesn’t work, although with port 24 it works perfectly. Can you explain me why it doesn’t works with port 21 and why you choose port 20121 ?
Hi Franco
A lot of ISPs will block port 21 and other known ports. I use a high port number because I don’t want auto scanners trying to attack my server.